Gabriel Lewis
Level Design
Sunderbuss - WIP
Level Run Through
Level Overview
Throughout this page I will be breaking down the aspects of the Minimum Viable Product level that we have been creating for our Sunderbuss project.
I will be exploring how I did certain aspects, but for those who want a lighter read there will be a 'Too Long Didn't Read' (Tldr) at the start of each section.
What I did
- Concepted the game with my partner.
- Developed the narrative of the level.
- Researched the setting and function of the level. - Design Doc here.
- Collected reference images, and blocked out the level.
- Implemented basic prototype functionality for the gun using blueprints.
- Implemented functionality across the level using blueprints.
- Continual Iteration.
Overview
- Sunderbuss is a first person puzzle shooter which focuses around a solar powered gun that can be used to defeat enemies or transfer energy from one place to another. If the player is not in light the gun will de-charge and will have to be recharged at the next available light source.
- The game is currently being made in Unreal Engine 5.
- This level is designed to showcase the main mechanics, level enemies and the level interactions.
Page Sections:
Gun Functionality
Level Design
Level Functionality
Level Design Choices

The Canyon - First encounter with enemies.

The abandoned village - Learn the mechanics of the game.

The train station - One last puzzle with a rewarding view.
The Canyon - First encounter with enemies.
Gun Functionality
Tldr - Created a light that charges the gun when the player is illuminated by it.
Before I could start to create the layout of the minimum viable product (MVP) level I needed to determine how the gun would work. For the gun functionality I had to find a way in which the gun could know if it was in light or not so it could start charging.
I quickly threw together a prototype to explore the relationship between the gun and a light source (this prototype was then elaborated on by my partner who has been working on the finalised mechanic).
To make the light mechanic I created a spot light, attached a cone mesh which I then turned the visuals off and made the collider into a trigger. When the player enters this trigger the gun starts to charge. This worked fine until the player was in a shadow, but the light still charged the gun. In order to fix this I made the light fire out a ray cast on tick from the light source - if the raycast hits the player then the player can be seen and the charging begins - if the raycast hits anything else then the charging will not begin.
Level Design
I started the process of creating this level the same way I do with most of my levels. I gathered reference images (50+) for each area of the map. I wanted the level to be centred around some form of industry as the narrative of the game used industry and technology as one of its central themes. This led me to base the level on Cornwall and its many engine houses that dot the landscape.

Reference Images
Level Flow
The idea for the level was that the player would start in an area with plenty of light, surrounded by nature - This scenario is beneficial for the player as it provides long lines of sight, plenty of charge for the gun, and a feeling of growth and safety.
The player then progresses into a canyon section which has engine houses built into the canyon walls - it is in this area that I could start to be more purposeful with my building structure, altering the way the light falls on the level - I also start to introduce enemies in this area.
Following the canyon is the facility - This area of the level is completely dark, apart from lights that have been purposefully placed. With limited lighting, confined spaces and many corridors the area feels much more threatening. The higher amount of enemies in this section provide moments of higher intensity. The player has gone from being in relative control with the natural sunlight, to the enemy having the upper hand in the darker areas. Puzzles drive the player forward throughout this section of the level.
Once the player has defeated the robots and worked through the puzzles they take a final elevator up to a train station. The train station brings the players to the end of the level. The final door that the players interact with provides a vista that reveals the next location to the player.

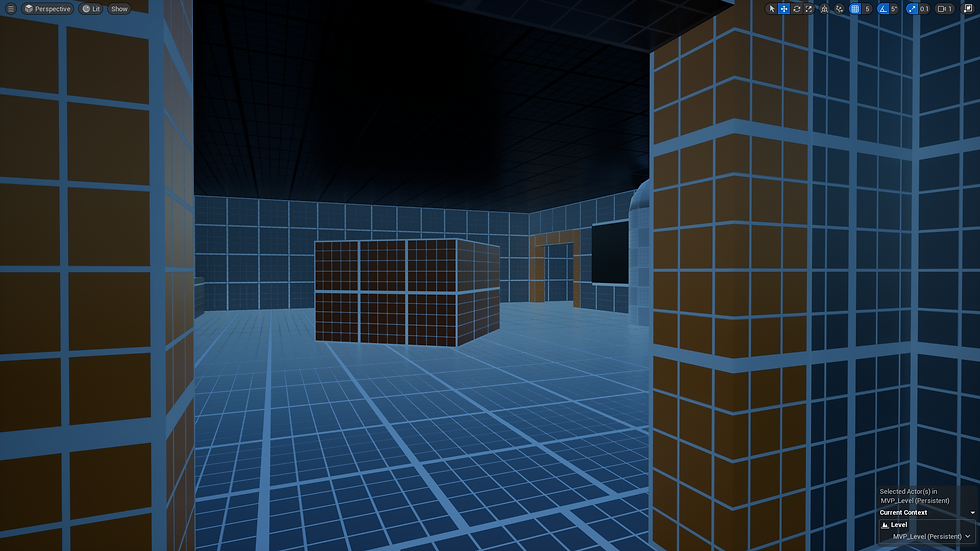
Level Overview
Level Functionality
Doors/ Moving platforms:
Tldr - A mesh that can be activated, when activated it will move to the same location as another mesh. It can be set to move back to the original position on a flip flop.
For the doors throughout the level I used blueprints to move a mesh from one location to another. This was done by using a timeline component to get the alpha of a lerp that would determine how fast the mesh should move from location A to location B. An "activated" Boolean variable was added to the script to allow for special functionality, allowing the mesh to be moving when the player got close to them.
Rotating platforms used a vary similar script, but rotation values were taken as the starting point for the lerp and a custom value could be added for the end rotation.
Exploding Robots:
Tldr - Inspired by Doom Eternal - When the robot is shot the mesh is turned off and a particle effect plays at the location of the original mesh.
By using interfaces we were able to have the gun interact with many different blueprints. The robot blueprint uses the interface to call its death function. For the death of the bot I would remove the collision component and set the mesh visibility to false so the object would essentially disappear. Then by using Unreal's Niagara particle system I was able to create a death particle effect which used nuts and bolts that I modelled in Blender. I would then spawn this effect when the other mesh components were turned off.
By taking the position of the gun barrel I could make the particles move in a certain direction to give the gun the illusion of having force. I would set the rotation of the particle system by using the origin location of the gun line trace, then having the particle system face that direction, and apply a negative x force in the particle system window.
Pickups:
Tldr - Throughout the level there are health and seed picks ups. Health pickups update the players health values, and seeds update the seed count.
When the players collider hits the collider of a pickup blueprint the mesh visibility and collision of the blueprint is turned off. This is done by using an on component overlap which then fires off the event.
Depending on what type of pick up it is different things can happen. If it is a health pickup, then using the player reference in the blueprint, I can update the player health variable from inside the blueprint of the pick up. If it is a seed pickup then I can update the UI element to add a seed to the current seed count. Picking up a seed also increases the player seed count variable.
Loading/Unloading the Level:
Tldr - The map is big, unload things not needed.
Due to the size of the map, we had decided that loading parts of the level in and out would be necessary in order to promote optimal performance. Therefore I worked through the level, creating sublevels that could be loaded in and out depending on if a player hits certain triggers.
Level Design Choices
Throughout this section I will be highlighting, with pictures, the level design choices I made in order to guide the player through the level and onboard them to new mechanics they may not have played with before.
Each section will have a picture or gallery of pictures that will describe what they are showing.
Onboarding the player:
With our light mechanic being at the forefront of the game it is key that the player understands how the light mechanic works. This required a certain amount of onboarding so the player could navigate through the level, and complete more complex puzzles as they progressed.
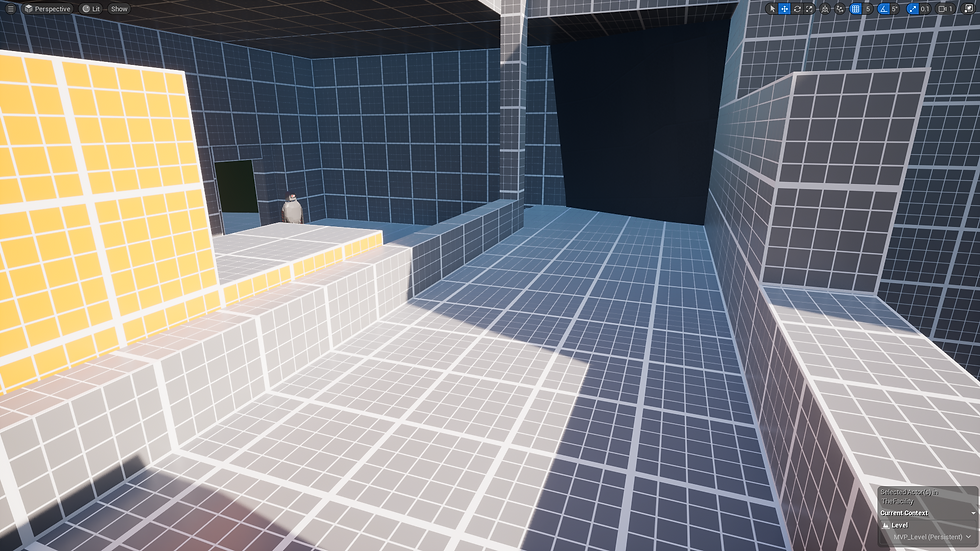
Establishing a clear language of how different elements interacted was crucial. In order to do this, I started with the most basic interaction. Shooting a target that would open a door. This then progressed to introducing the yellow line. The yellow line was used to show the relationship between the box and the thing it would be interacting with. This allowed me to then move the charge box away from the thing it would be interacting with and guide the player using the yellow line.

The very first charge box/ door interaction - shoot the box the door lowers.

Introducing the yellow line to show association.

After a whole level of understanding how light is used to charge the gun - the player is challenged with finding the light in this scenario to charge the box on the left.
The very first charge box/ door interaction - shoot the box the door lowers.
Enemy placements:
In order to add suspense and moments of heightened intensity we decided that we would add groups of enemies for the player to defeat. These enemies would be melee only - therefore my layout of the combat areas was move movement focused rather than cover based. The interaction between the player, enemies, and the lights allowed for much more tactical combat due to the lights being the resource required to defeat the enemies.
The first enemy interaction - player at height advantage, enemy has to travel a long distance to reach player.

Giving the player options - using the light source to draw the player into the room and providing lots of space to move around the enemies.
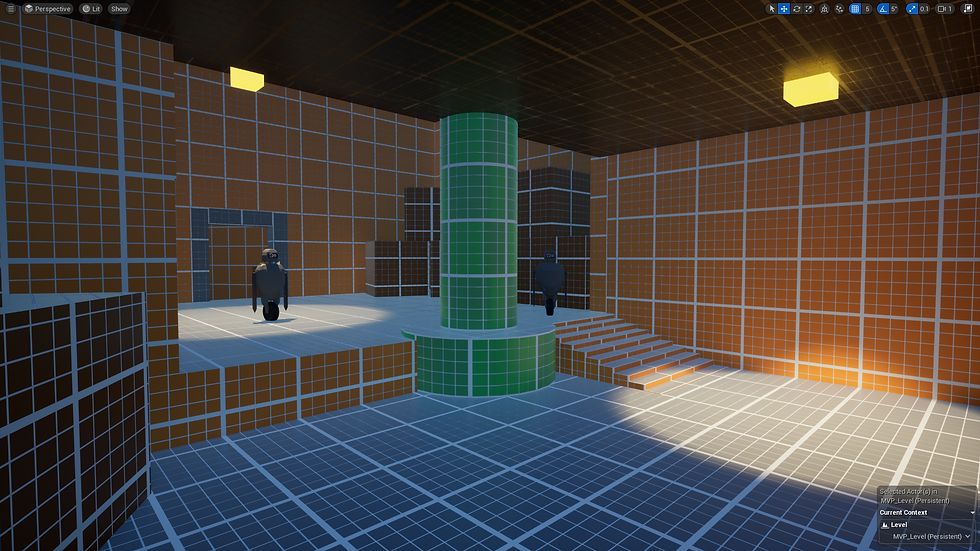
Again, making the enemies move so the player can reach the desired light sources.
The first enemy interaction - player at height advantage, enemy has to travel a long distance to reach player.
Lines of sight:
Throughout the level there are several uses for lines of sight. These could be used to orient the player, provide them with the location of a secret seed, or give them a heads up of future enemies. Lines of sight are really important for this level as they allow me to provide the player with as much or as little information as I desire in order to create a more purposeful experience.
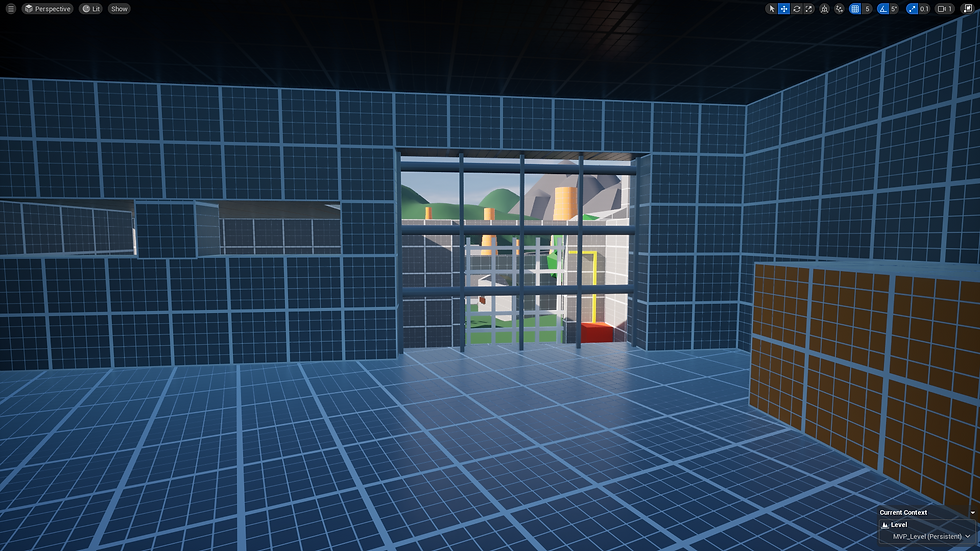
Showing the player where the next goal is. Motivating their movement.

Allowing the player to see a route that is not on the 'golden path'.
Motivating the movement of the player - but is there something hidden behind the wall?
Showing the player where the next goal is. Motivating their movement.
Moving Objects to draw attention:
In certain areas of the level I need to draw the players eye towards a particular direction. I decided a good way to do this was by using moving objects. The movement of the object catches the players eye allowing me to put information in the area of the moving object.
Orientation:
It is important the player is able to figure out where they are within a level, especially after the player is forced into areas that are more narrow and confusing.
In order to help with player orientation I used geometry that pushes and pulls the player in certain directions. I also used signs and colours in order to inform the player as to where they are and what direction to head in.
In terms of level interiors I was aiming for a similar layout to that of Bioshock. Most of the level is built to be linear, with small areas of multiple choice in terms of direction. The linearity of the level allows myself to introduce new mechanics that the player may not be familiar with. once the player has an understanding of these mechanics the level starts to open up in the facility.
The Facility, although still linear, does become more open allowing the player to explore their own path. With the puzzle element of the level, however, it is important that the player is able to keep track of their progress throughout, therefore the level has many bottle necks that bring the player back to the essential path.
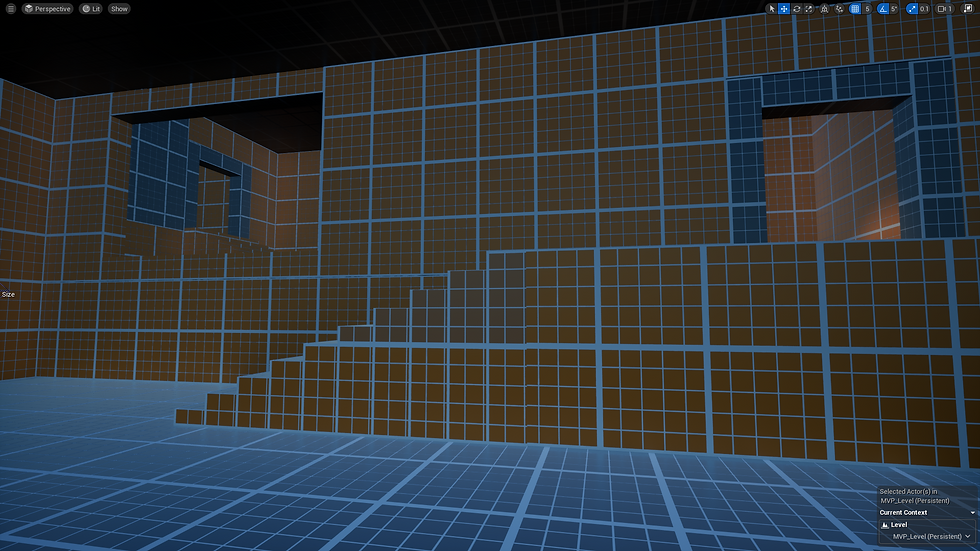
Geometry added to rooms to push the players in a 'desired' direction.

Slats on the ceiling pushing the player to the right, stairs to show affordance, and an arrow on the wall to orient the player when they leave the room.
The colours that are used to show what floor the player is on are also used on the pillars to help the player orient themselves.
Geometry added to rooms to push the players in a 'desired' direction.
Rewarding View:
The final element that I wanted to discuss is the rewarding view at the end of the level. This view is designed to highlight the chapter goal (a goal that comes after completing a series of levels). It rewards the player with a sense of progression, whilst also enticing them to go towards a new interesting location that they may have heard about but have yet to see.

Final Vista

Final Vista - Mountains make leading lines towards the Solar City - The city itself will catch the light and colour of the setting sun making it stand out next to the greenery of the forest below.